
Student Support Team/Personal Tutors
Personal Tutors
How do I set-up a rule that allows me to filter emails from my students into seperate folders when they arrive in MS Outlook?
If you get many emails from a particular student you may want to automatically put them into a particular folder so that you can manage them more easily. This explains how to do this using a rule in MS Outlook.
There are three options for creating a rule
Option 1: Quick set up to move emails
This option gives you a very quick rule set up but does not allow any customisation of the rule or give you the option to run the rule now or later.
- First of all you need to create a folder in Outlook for the student - press the F1 key in Outlook and search for Create a folder for help on how to do this. We have set up an example folder for a student named Sheila Fraser.
- Select an email from the student in your Inbox
- Go to the ribbon in Outlook

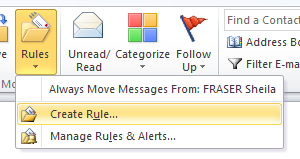
- Select the dropdown on the Rules icon
- Select Always Move messages from
- Select the folder you set up for the student. Select OK
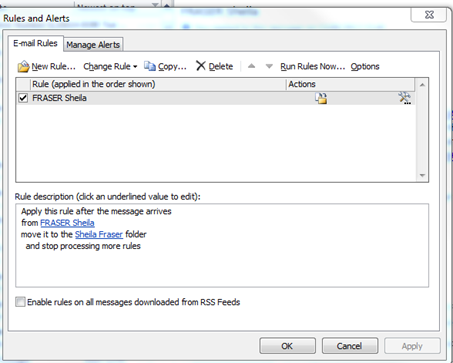
- A rule is now set up and emails are automatically moved to the student folder. You can see the rule under Rules > Manage Rules and Alerts
Option 2: Creating a rule from scratch
This option lets you set up a rule allowing simple or complex customisation of the rule and gives you the option to run the rule now or later.
- First of all you need to create a folder in Outlook for the student. We have set up an example folder for a student named Sheila Fraser.
- Go to the ribbon in Outlook

Select the dropdown on the Rules icon
- Select Manage Rules and Alerts option
and the Rules and Alerts box opens. Ensure you are on the Email rules tab.
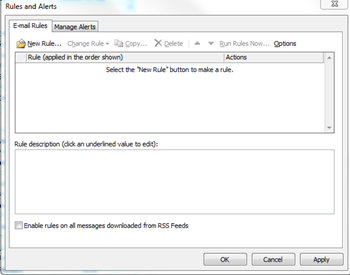
- Select New rule button
 on the toolbar
 - This opens the Rules Wizard box. From this Rules Wizard box you can apply many different rules. For this activity we are just going to move messages received from a particular student to the folder you created for them in item 1.
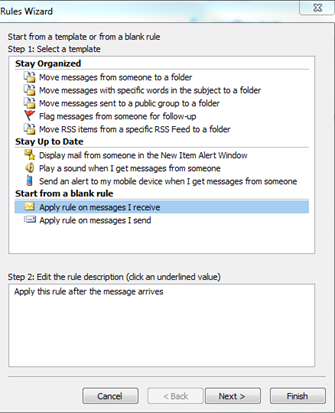
- Select Apply rule on messages I receive under Start from a blank rule. Select Next to take you to the conditions you want to set
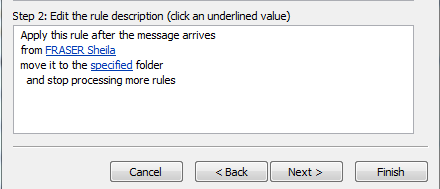
- In the conditions screen select from people or public group. Select Next and select move it to the specified folder
- If a word in the list is underlined you need to add more information
- Under Step 2 select people or public group to bring up the Rule address box. Here you can choose who the rule applies to.
- Select the student from the student list under Other Address books, select OK. The people or public group link in Step 2 has now changed to your students name
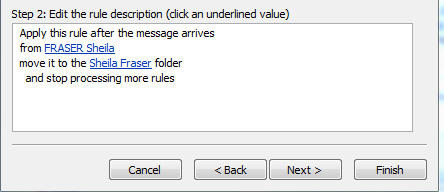
- Still in Step 2 select specified folder
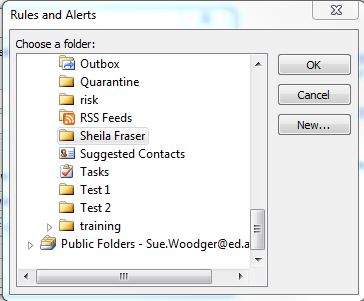
- Choose the folder of the student, select OK. You can now see the specified folder has been changed to the students name in Step 2
- You now have 3 options:
- Add Exceptions in which case press Next and complete the following screens until you reach the Finish rule setup
- Finish up without being able to add your own title to the rule or running the rule immediately in which case press Finish
- Complete the rule set up by adding your own name to the rule but not add exceptions
- So for this activity we will go with iii so press Next buttons until you reach the Finish Rule setup
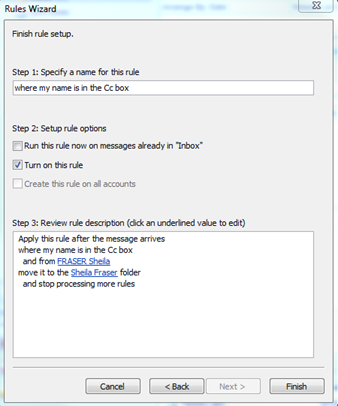
- Give your rule a name – change the default in the Specify a name for this rule to a more memorable name e.g. Emails from [insert Student name]
- Step 2 - choose Turn on the rule and if you want all existing messages in your inbox to be moved to the folder now tick Run this rule now on messages already in “Inbox”. If you want to move the emails at another time see section on How to move emails into folders manually.
- Select Finish
- You are taken back to Rules and Alerts box where you can see rule set up
- Press OK
- Check your student’s folder to see all emails have been moved into the folder

Option 3: Selecting an email from the student to create a rule
This option allows limited customisation if the rule and can be run on any email from a particular person in your inbox
- Again you first of all you need to create a folder in Outlook for the student. Again we are using Sheila Fraser as an example and have set up an example folder for her.
- Select an email from the student in your inbox (in our case Sheila Fraser)
- Go to the ribbon in Outlook

- Select the dropdown on the Rules icon
- Select Create Rule

- This will bring up the Create Rule window

- Select the tickbox beside From + Student Name
- Delete whatever is in the subject box for now (You can also set up a rule by subject or combinations of person, subject and sent to)
- Select Move the item to folder
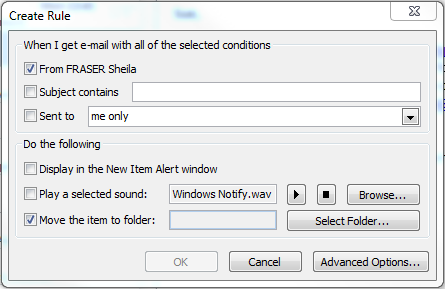
- Then the Select Folder… button. This brings up the up the Rules and Alerts box where you can choose the folder you have created for the student
- Select OK
- This takes you back to the Create Rule box. Select OK to create the rule.
- The rule is now created. The success window then appears telling you that the rule has been created and asking you if you want run the rule now on messages already in the current folder.
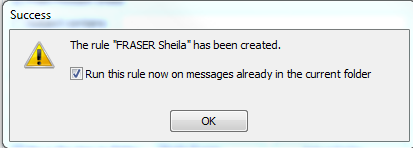
- If you want all the emails from your student to be moved into their folder immediately then tick Run this rule now on messages already in current folder. Press OK. Check the folder and you will see all items from your student have been moved from your inbox into the folder.
- If you do not want the emails to be moved immediately then do NOT tick the Run this rule now on messages already in current folder. Press OK. See section on How to move emails into folders manually.
- You can see it if you go into Rules on the ribbon then Manage Rules and Alerts